|
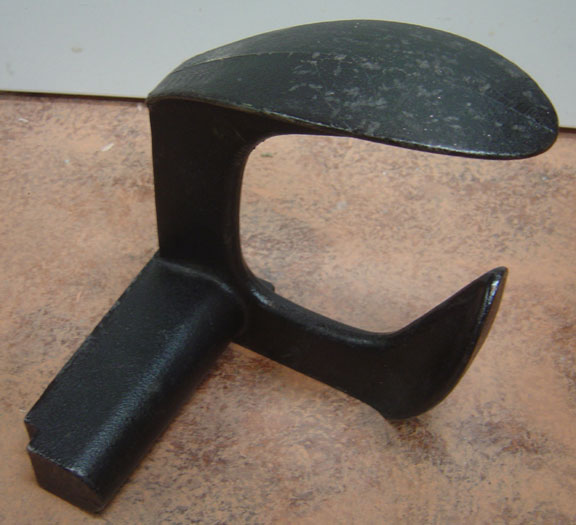
Some form of iron shoe anvil is necessary for the installation of the hobnails. This one is called a dragons claw, and I purchased it new from a shoe findings shop for about $30.00. I have found them numerous times on ebay. For Roman footwear, a superior one could be made by welding a foot shape, or an oval of heavy steel to a shaft you can fix in a vice or a floor block .The reason I say superior is because the curved top surface of any anvil you can buy does not lend itself perfectly to the very flat sole contour of a Roman shoe. Another option might be to get a piece of 1/4 steel flat stock, and bend a couple inches over, and round the end off.
|
|
|
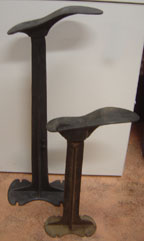 |
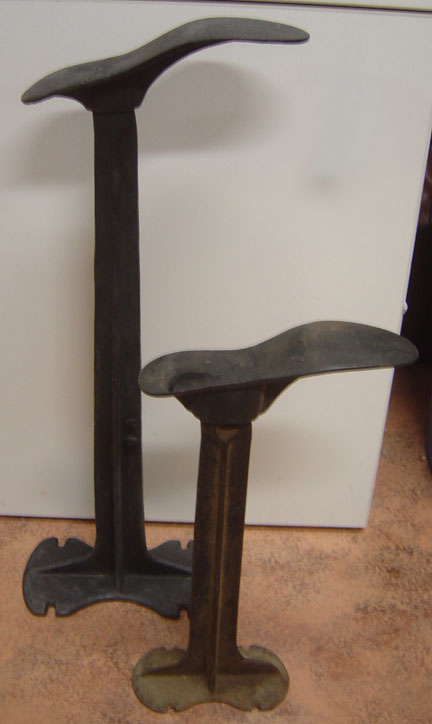
Here is couple bench mounted shoe anvil, and a floor model, both with interchangeable heads. I have also seen these on e-bay a number of times. I have used both of these to, but again, the curved contour does not mesh well with the flat Roman sole. |
|
|
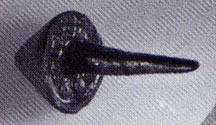 |
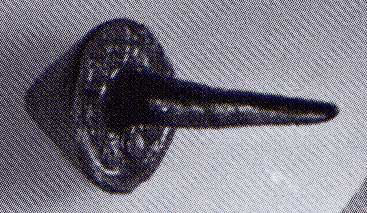
Here is a real Roman hobnail, featuring a square shaft and smooth conical head. Certainly there would have been much variation in the manufacture of millions of handmade nails over hundreds of years. As you can see, it is a far cry from the Tremont nail. |
| |
|
 |
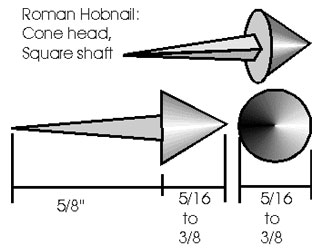
My design for a reproduction roman hobnail. |
| |
|
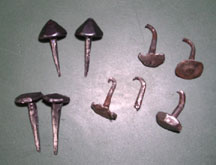 |
Hobnails used by Flavius Promotus and his LEGIO TERTIA ITALICA ANTONINIANA on their historic march from Bavaria, through the Alps, to Italy. This illustrates the importance of the high cone in terms of longevity. The two flathead nails to the left are Tremont nails, for comparison. Check out their excellent shoe page here. |
| |
|
 |
Le Prevo Leathers in Britain carries a wide array of hardware, vege tanned goat hide and a nice hobnail. It is a truncated cone unfortunately, but it's better than the tremont nail. |
| |
|
 |
These are the nails from Tremont Cut Nails, which are commonly used for hobnails. They are 5/8" long, wrought head nails, stock number CW-58M, black oxide finish. 1 pound equals roughly 300 nails. Although not historically accurate at all, they are a serviceable substitute. The shafts are very irregular, which makes them difficult to place properly, and gives them a tendency to want to angle in. It is also fairly easy to break off the head. |
| |
|
| |
|
 |
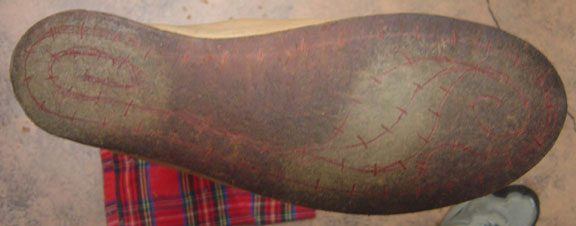
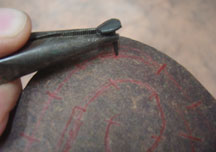
When I nail a shoe, I draw out the pattern and make hatch marks wherever I want a nail. Many Roman shoes have anywhere from 75-120 nails, usually placed close together, especially around the edge. |
|
|
 |
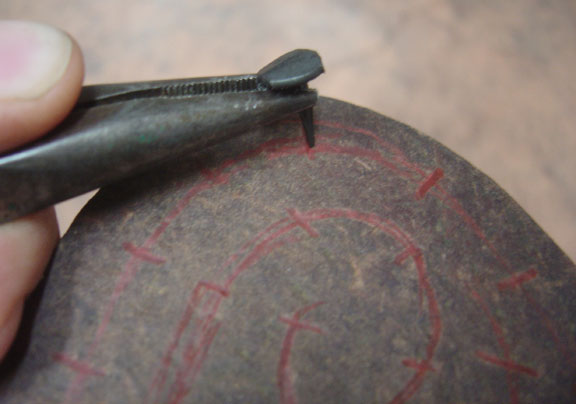
I find the best method for placing the Tremont nail is to use needle nose pliers, allowing you to hold the nail straight while it is being driven. Once it is deep enough not to veer off course, you can dispense with the pliers. |
|
|
| |
|